
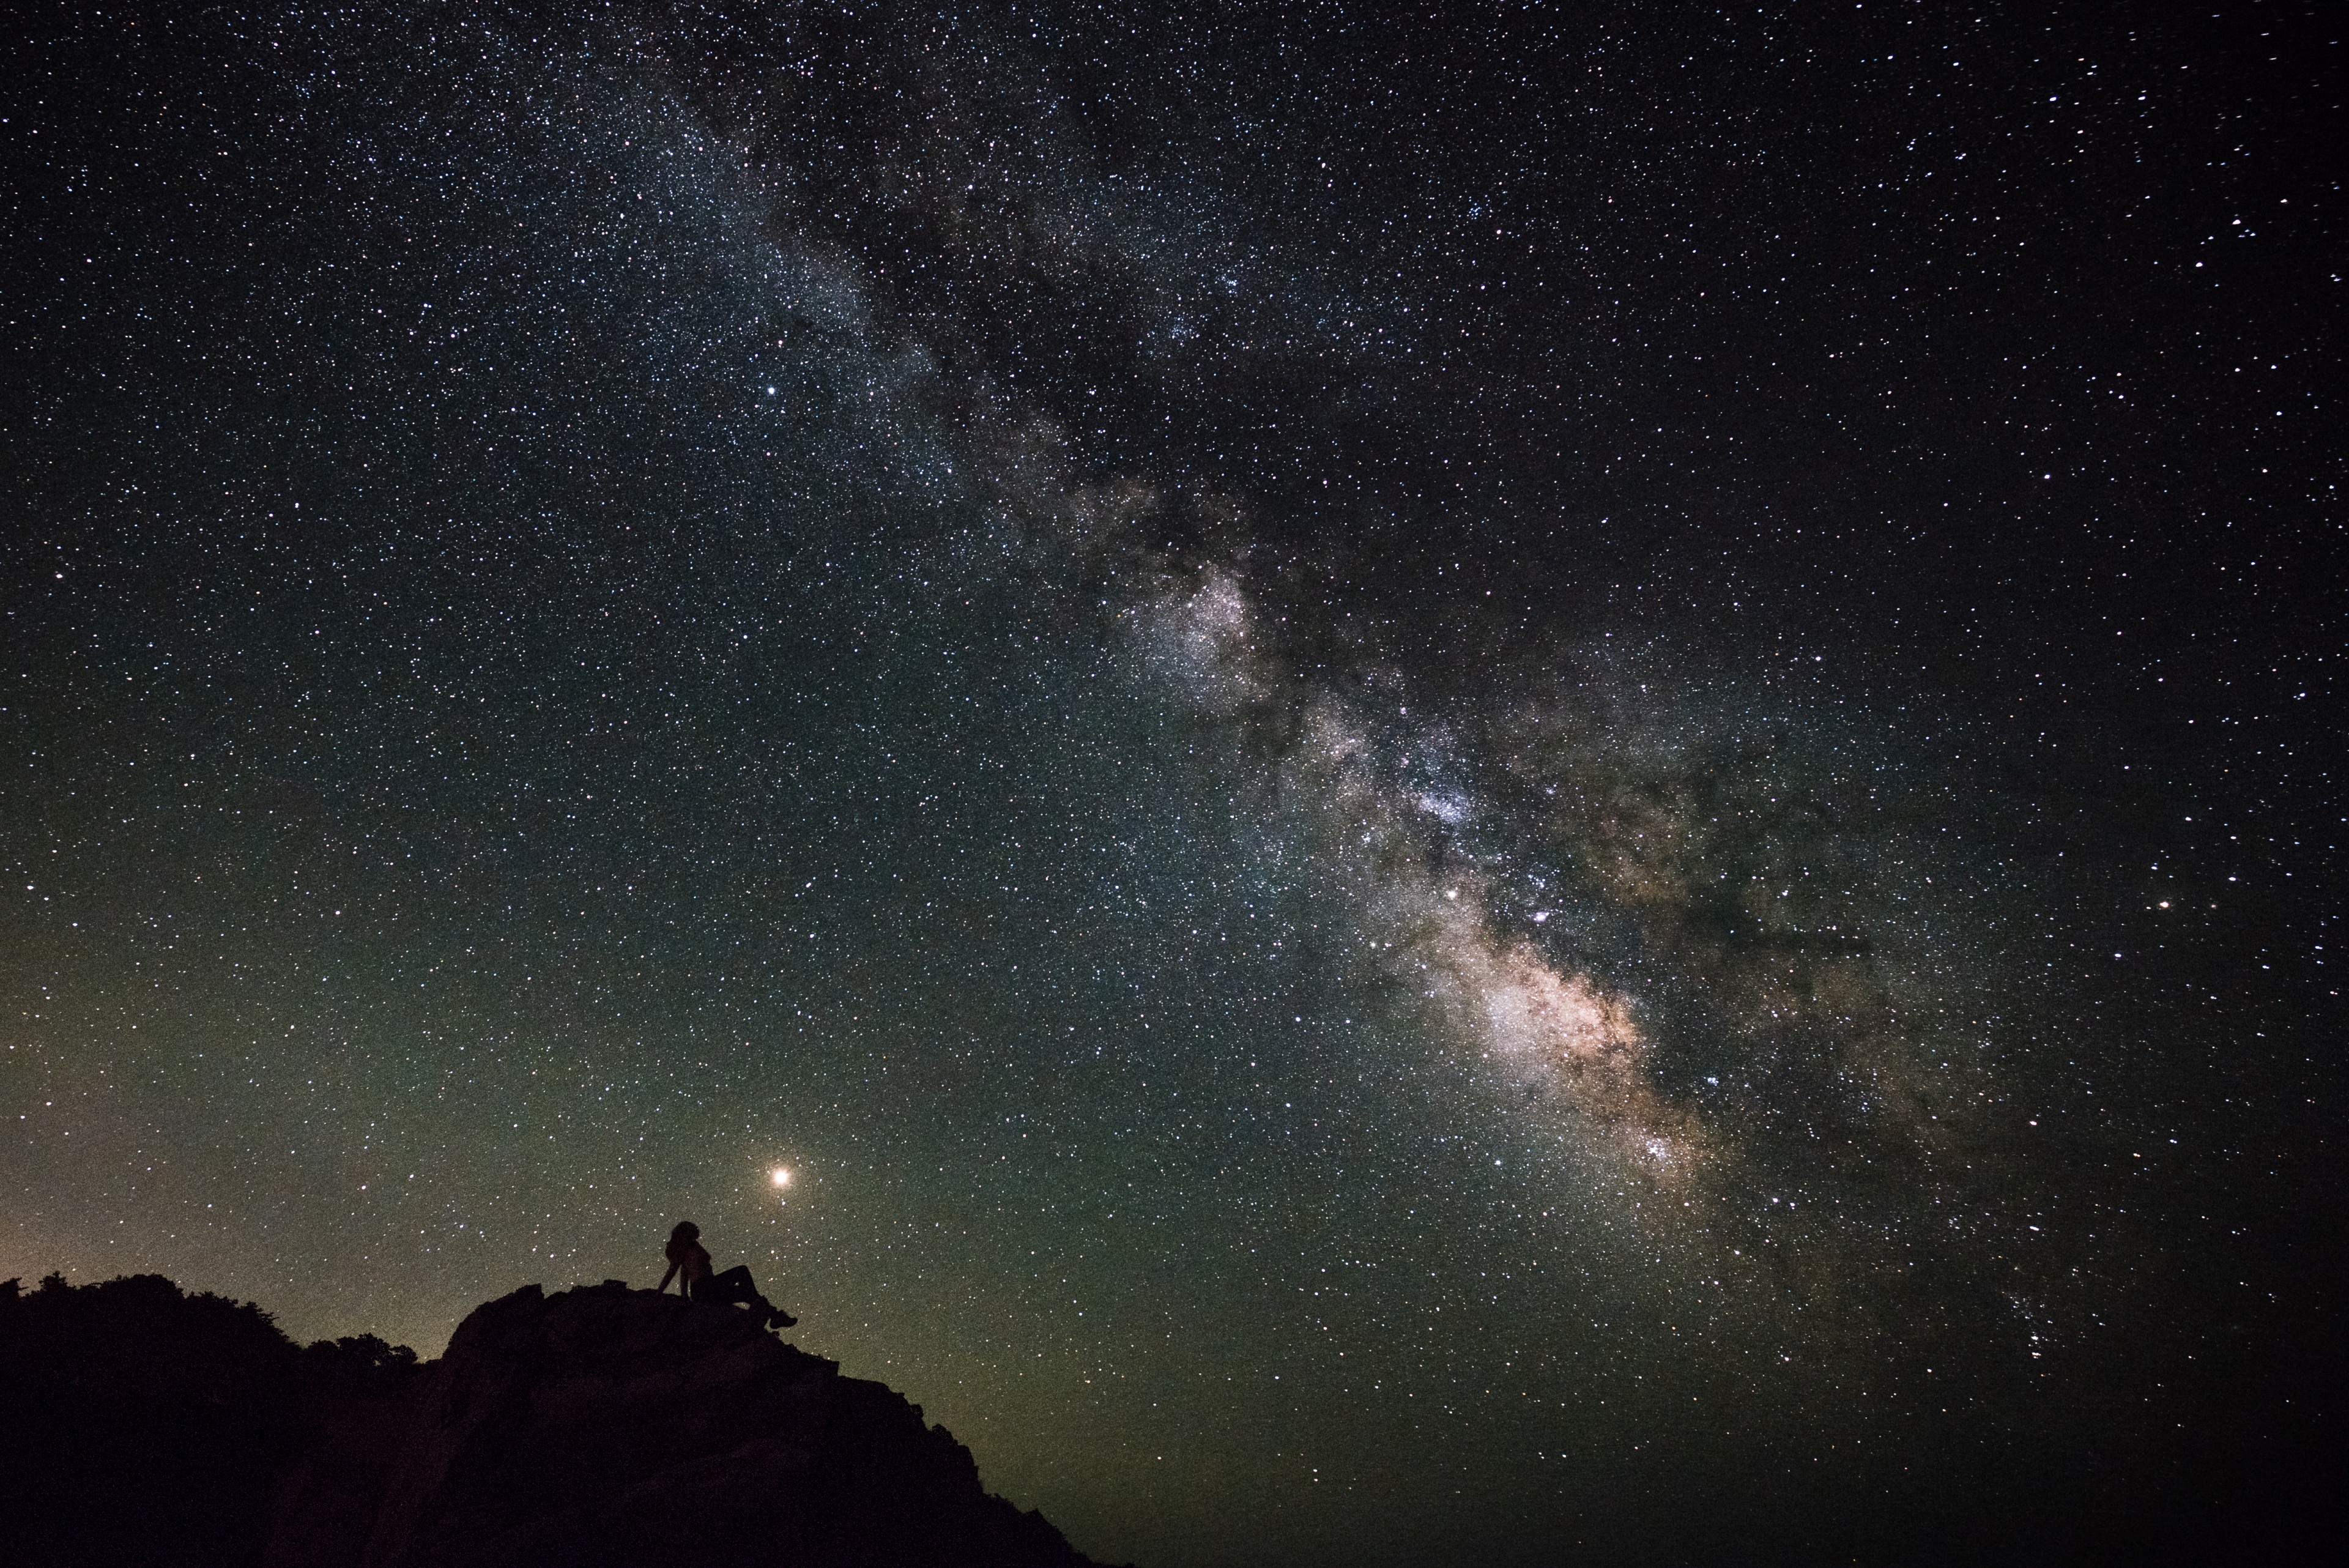
This past weekend, I went on a camping trip to Ocean Cove, a gorgeous campground just north of Jenner, CA. It gets very dark there at night, especially when the moon is new. Just after midnight, I set up my tripod and camera on a big rock overlooking the Pacific Ocean, the Milky Way, and Mars. My girlfriend Liv perched herself on another rock in the corner of the frame. I readied my camera, took a few photos, and ended up with this:
I’d like to share with you how I created this composition in five steps – please join me in this photographic journey!
The Five Steps
I’d like to break up my process for capturing this image into five steps:
- Planning: Ensuring that conditions will be optimal for the shoot
- Composing: Placing the camera and framing the shot
- Directing: Telling another human being where to go
- Capturing: Modifying the camera’s settings and capturing enough frames
- Processing: Using photo editing software to create the final result
1. Planning
I did a few things to ensure optimal conditions for this shoot:
- I took a similar shot of the Milky Way from Ocean Cove Campground last year, and I knew that I wanted to improve last year’s photo.
- When initially planning this year’s trip to Ocean Cove, I deliberately chose a weekend where the moon would be as close to the “new” phase as possible. I used this website to determine the phases of the moon in the future.
- I waited as long as possible after sunset before heading down to the coast. Too early, and distant headlamps or lights from the RVs in the campground would disrupt the shot. Additionally, where it’s really dark, the last light from the sun takes a very long time to disappear.
I also wanted to be cognizant of Liv’s bedtime and how chilly it was for her, so I didn’t want to take photos too late. If it were completely up to me and I wasn’t too afraid of asking, I would have been out there at 3am. 🙂 - I hoped really hard that the skies would be clear. Going camping in July helped my chances of that. Coincidentally, the night after I took this photo, the skies were very cloudy.
- I brought along my heavy-duty Manfrotto tripod and favorite wide-angle lens. Side-note: My parents got me this tripod many years ago for Christmas, and it is still going strong. My next (lighter) tripod will likely be another Manfrotto!
2. Composing
Location Scouting
First, I scouted this rock for a specific spot that met the following criteria:
- The spot had to be close enough to the edge of the rock such that the edge of the rock wouldn’t show up in the frame.
- I needed to have a view of something interesting in the foreground, like Liv sitting on a rock. Photos of stars alone are surprisingly boring.
- The spot had to be far enough out over the ocean such that a majority of the bottom-right of the frame was open air or ocean, as opposed to more land or coastline.
- Keeping (2) in mind, the spot had to be close enough to the coast such that I wasn’t pointing the camera back at Liv too far, or else I’d get too much of the campground in the frame.
- The spot had to be as free of seagull poop as possible, which is a genuine challenge for rocks along the coast. Priorities, people.
Upon finding a suitable spot, I set up my tripod such that I could comfortably sit on the rock and still use my camera from that sitting position. The creative part came next!
Composition
There is no way for me to tell you exactly what ordering, sizing, and positioning of elements in a photo is “the best.” This is something that you must discover for yourself. There are “rules” that you can follow, and “best practices” you can employ, but the composition of a photograph is a deeply personal artistic choice. Experiment for yourself and discover what you prefer!
In this specific case, there were several compositional elements that I knew I wanted:
- The Milky Way should make up a majority of the frame
- Mars should be a prominent element in the frame (by the way, Mars is brighter now than it has been since 2003)
- The rock closest to me should extend to the left of the frame and below the frame.
- The rock closest to me should appear in shadow.
- The rock should take up a relatively small amount of space at the bottom left of the frame.
- Liv should be positioned towards the apex of the rock.
- Liv should also appear in shadow.
- Liv should be positioned close to Mars.
- The horizon should be straight.
With these “soft requirements” mentally noted, the rest of the composition fell into place. I sat on the rock and adjusted the tripod according to my preferences.
3. Directing
Anytime a person is involved in a photograph and the photo isn’t meant to be candid, the photographer must direct the human. Direction ranges from simple (“Go stand over there!”) to complex (“Raise your right arm, curl your big toes, and straighten your back! Pop those shoulders! Twirl around three times!”).
Liv had been sitting next to me up until this point in the process. At this point, I asked her to climb up onto the rock and do a few things:
- Stand on the top of the rock and point upwards with your arm parallel to the camera. Aim your finger at Mars as best you can.
- Hold that pose until I take enough pictures, at which point I’ll flash my headlamp at you (because you won’t be able to hear me over the ocean waves). When I flash my light…
- Turn on your headlamp, put your hands by your side, and look up really high.
Liv carefully ran off to the rock and did exactly those things (with her own personal flair, of course). The photos resulting from those poses came out well enough, but what happened next was a stroke of creative genius: She yelled out: “hang on a second, I have an idea!” She sat down on the rock and struck the pose you see in the final result. Perfection.
When directing people, sometimes you only have to make someone feel comfortable enough, then give them a chance to be creative on their own. This night was one of those times.
4. Capturing
Hardware
None of my process up to this point has had anything to do with the specific photographic hardware that I used. Only during this step does the hardware matter!
I’ve been using a Canon 5D Mark III for the past five years. The lens I chose for this shot was a Canon EF 16-35mm f/4L IS USM Lens.
Stacking
Last year’s Milky Way photo was the first time where I employed the astrophotography technique of “stacking”. The basics of stacking are “take lots of pictures from the same place using the same settings, combine them, then subtract out noise.” You can read more about stacking here.
There are a few stacking-related terms you should understand before continuing:
- “Light Frames” – The photos containing the image data of the actual subject of your photograph.
- “Dark Frames” – Photos taken with the same settings as the “light frames”, except with the lens cap on. These are used when subtracting out noise in software later.
- “Flat Frames” – Photos taken of an evenly-lit surface with the same focus and aperture settings. These are used to remove “vingetting”, the darkening at the corners of images. I didn’t take any flat frames this time around, and, if you look closely at the final result, you can tell.
- “Bias Frames” – Photos taken of the lens cap at the fastest possible shutter speed at the same ISO as the “light frames.” These are used to subtract out noise generated by variation in how the camera reads zero-light data off of the sensor.
Camera Settings
This year, I knew I wanted to try stacking a bunch of frames again. With that goal in mind and my composition set, I snapped a few test frames and eventually settled on the following camera settings:
- Lens @ 16mm
- The lens was fully zoomed-out to capture as much Milky Way beauty as I could.
- Aperture @ f/4
- I wanted to let as much light into the sensor as possible. If I had the f/2.8 version of my lens, I would have used f/2.8.
- Shutter speed @ 10 seconds
- At focal lengths between 16-35mm, star trails become very obvious at any shutter speeds slower than 13 seconds. Even 13 seconds is pushing it, in my experience.
- ISO @ 4000
- The 5D3’s noise profile is quite clean even at 4000 ISO. Better, more modern cameras would perform even better. Older or lower-quality sensors (including those found in even the best mobile phones) would perform badly at this ISO.
- Shutter delay @ 2 seconds
- This negates any motion that my finger imparts on the camera when I press the shutter button.
- Whenever I have my camera on a tripod and I’m shooting landscapes, I shoot with a 2s shutter delay.
- RAW image output (not JPG)
- ALWAYS shoot in RAW!
More Capture Details (And A Confession)
After adjusting the camera’s settings according to the above, I captured:
- 6x Light Frames
- 5x Dark Frames
- 12x Bias Frames
- 1x Liv Frame (see below…)
As you may be able to glean from the above, the final image is a composite image – it is not a single image straight out of the camera. Furthermore, the part of the photo containing Liv and the rock she’s sitting on is from a completely different exposure than any in the set of light frames.
In my opinion, composite photos that don’t alter the original landscape of a subject carry the same artistic authenticity as a single photo straight from the camera. There is lots to discuss here – perhaps for another post!
5. Processing
Post-processing my images is a hugely important part of photography to me. I have never shared a photo straight from the camera!
Processing the 24 images I captured consisted of a few steps itself:
A. Stacking the Stars
Using DeepSkyStacker 4.1.1, I combined the 23 images of the stars that didn’t contain Liv. In the resultant image, the stars and planets looked amazing. The rock and trees in the bottom left looked blurry due to the rotational correction applied to the individual frames by the stacking software. That was OK, because I knew that I was going to replace that part of the image with the rock and trees from The Liv Frame. I was very happy with the result.
B. Editing the Starry Image
I then brought the result from (A) into Adobe Lightroom CC and modified it to my artistic preferences. I played with the color temperature, exposure, highlights, shadows, clarity, and other parameters. The details here aren’t very important – all that’s important is that the result looks great!
C. Cutting Out Liv
After that, I took the result from (B) and The Liv Frame into Adobe Photoshop CC. In The Liv Frame, I used the Magic Wand tool set to a very low threshold to select the dark rock. I then cleaned up that selection with the Quick Mask tool plus a feathered Paintbrush. I perfected the selection of Liv with some careful usage of the Polygonal Lasso Tool. Finally, I applied a small amount of feathering (~2px) and smoothing to the selection to prevent harsh edges.
I cut out that section of the image from The Liv Frame and pasted it into a new layer of the final starry image from (B).
D. Merging the Two Photos
Anytime you combine two images, it is very likely that you will have to perform some geometric and color correction to one of the images to account for their differences. In this case, I made the following adjustments to the rock and Liv layer from the result of (C):
- Geometric Correction: I lined up the pasted rock with the rock from the original image. Because the rock in the original image was a bit blurry, I ended up slightly enlarging the pasted rock such that I couldn’t see any of the blurry rock.
- Color Correction: The pasted rock was a bit too bright and yellow for my liking, so I toned down its brightness and played with the levels until I achieved the desired result.
E. Exporting
Last, I captioned the final image in Lightroom, and exported it to my SSD. Woohoo!
Things I Learned
There are a number of things I learned from this year’s Milky Way capture that I’ll use next time I want to photograph the stars:
- My 5D Mark III has a “Multiple Exposure” mode that captures multiple frames consecutively without any user input. Normally, I would use that mode to merge multiple shots into one using in-camera software. However, I wouldn’t use it that way: I now know that I can use that mode to capture 9 frames of starlight consecutively without touching the camera. This would accomplish a few things:
- Pushing the camera’s shutter button always moves the camera, even if that motion is very slight. Enabling Multiple Exposure mode means I’d only have to press the shutter button once, minimizing potential camera motion.
- I could minimize the time between exposures when if I used this mode, which means I could minimize the effect of the Earth’s rotation on my photos (i.e. the stars moving across the sky).
- I should capture more “light frames”. Six is enough, but I’d prefer more.
- I still don’t know what camera settings I prefer for astrophotography, but I am getting closer to what feels optimal for me. Balancing light capture and noise while minimizing star trails is very tricky!
- I’m still learning how to balance my own preferences with the preferences of my photographic model. I mean that generally, but in this specific case, I rushed a little when taking The Liv Frame because I was afraid that she would be too cold, or that it she would think that it’s too late. This is a complicated area of personal psychology that I’ve been learning lots about myself lately!
- Space is really cool.
Thank you for reading my post! If you have any questions, feel free to leave a comment below.