If you live in a large apartment building or high-rise built within the past 20 years, it’s very likely that your building is framed with metal studs. Follow these detailed instructions to learn how to confidently mount a television or other heavy object to the metal studs behind your drywall.
Other tutorials that I found for this project didn’t go into the level of detail that made me feel comfortable. Using the technique below, I have successfully mounted a 58.9-pound (26.7 kg) LG CX 77 (OLED77CXPUA) and a 47.2-pound (21.4 kg) Samsung UN60JU7100 to the metal studs of my apartment.
You can use similar steps to mount your TV into wooden studs. Please leave a comment if you need help adapting these instructions for use with wooden studs, or if you need help for another reason.
Table of Contents
Step 1: Gather your Tools
You’ll need the following things to complete this project:

- A Carpenter Square, like this $26 VINCA 24×16″ tool from Amazon.
- Not required. A tool like this makes leveling and measuring much easier in some situations versus using a tape measure. It’s helpful to have a carpenter square that measures 24″, because that is a common distance between studs.
- Painter’s Tape, like this $5 roll of ScotchBlue tape from Lowe’s.
- Not required. Very useful for both determining the distance from the ground to your TV and temporarily securing the wall mount’s paper pattern.
- A drill, like this $59 BLACK+DECKER 20V MAX* Cordless Drill from Amazon.
- Necessary for making holes in your drywall and metal studs.
- and 5. A 1/4″ and 1/2″ drill bit, like from this $28 set of DEWALT drill bits from Amazon.
- Necessary for making holes in your drywall and metal studs.
- A tape measure, like this $10 Komelon SL2825 Self Lock 25-Foot Power Tape from Amazon.
- Used for determining the distance from the ground to your TV, and for other various measurements.
- A wall mount that fits your TV. This $70 Mounting Dream MD2296-24K Full-Motion Mount from Amazon is fantastic – I’ve used it three times.
- Used for…mounting the TV to your wall.
- Snap toggle bolts. I highly recommend that you specifically get at least four of these specific bolts made by TOGGLER. Here’s a link to an $11 10-pack of TOGGLER 1/4″ Snap Toggle Bolts at Lowe’s.
- Used to secure the wall mount to the wall via your metal studs.
- A pencil for marking various spots on your wall.
- Four 1/4″ washers, like these $0.15 Hillman 1/4-in Zinc-plated Standard Flat Washer at Lowe’s.
- Used to spread out the load of the TV mount, easing the stress on the bolt.
- A stud finder. I highly trust this particular $53 Franklin Sensors ProSensor 710 Stud Finder.
- Used for locating the metal (or wooden) studs behind your drywall.
- A standard Phillips-head screwdriver, like the one included with this $20 Craftsman screwdriver set.
- Used for screwing the bolt into the wall and securing your TV mount.
- A bubble level, like this $18 Craftsman Torpedo Level.
- Used to make sure that everything is straight.
And, of course, you’ll need a TV to mount!
Step 2: Read your Mount’s Instructions, and Begin!
Next, read through all of the instructions that came with your TV wall mount so that you understand what you’re getting into.
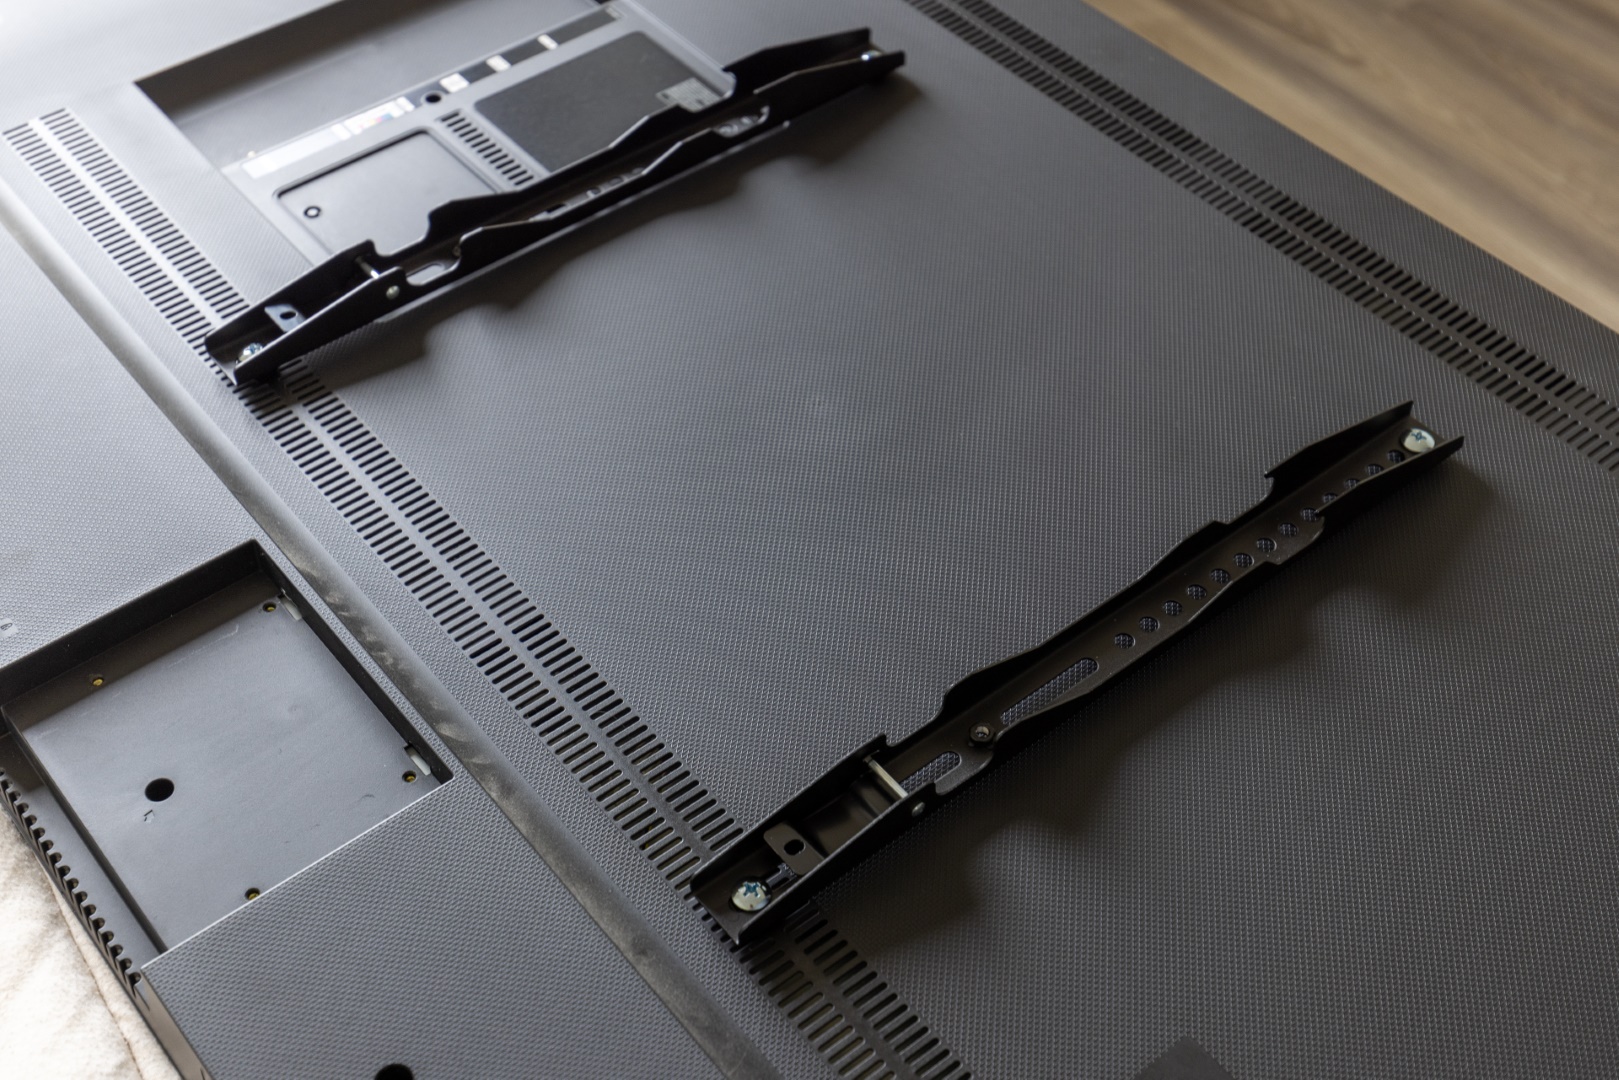
The first steps included with your mount are usually to screw some metal brackets into the back of your TV, similar to what you see below:
Step 3: Determine your TV’s Distance from the Ground
You’ll generally want to mount your TV such that, when you are in your normal sitting position and looking straight forward, the TV’s center is right at your eye level. This means that the center of your TV should be around 42 inches off the ground, unless your viewing position is significantly lower or higher than normal.
Using your tape measure, and taking into consideration the position of the holes in the back of your TV, mark where you want the center of the wall mount to be using a pencil or small piece of painter’s tape. Be mindful of the fact that the center of the wall mount may not be in the same place as the center of the TV.
In the next two steps, we’re going to adjust this center point based on the location of your wall’s metal studs.
Step 4: Find the Two Nearest Studs
We want to find the location of the center of the two vertical studs closest to the point you marked in Step 3. Your studs are likely placed 16″ or 24″ apart. To find these studs:
- Using your stud finder, find the general location of the stud to the left of the center point you marked in Step 3.
- Using your carpenter square or tape measure along with your bubble level, mark with a pencil the general location of the left stud along the same horizontal plane as the center point you marked in Step 3.
- Using your stud finder, and being as precise as possible, locate the left and right edges of this stud.
- Using your carpenter square or tape measure, mark the precise center point between those edges.
- Repeat the above steps for the stud to the right of the center point you marked in Step 3.
Check out the animation below for the method that I use to determine the left and right edges of a stud:

Step 5: Tape the Mount Template and Mark
At this point, you have the following information:
- The point on your wall where you’d like your TV to be mounted, vertically.
- The center of the studs to the left and to the right of that point.
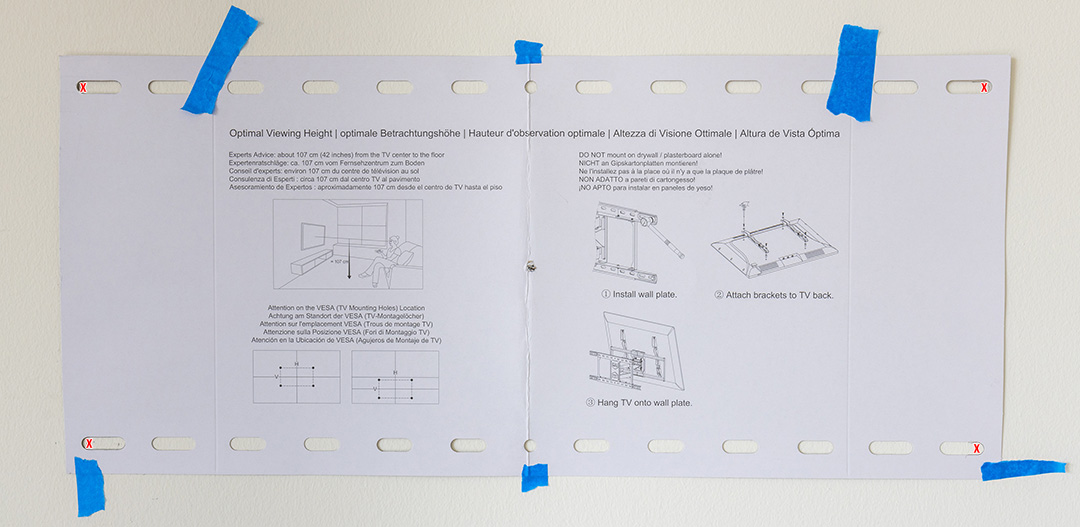
Using that information, you can now tape the paper template which came with your wall mount to the wall.
When taping, you must ensure that the holes in the paper template expose the precise center of the studs to the left and right of your marked center point. In other words, the holes should expose points in the same vertical plane as the center points you marked in Step 4. You can use your carpenters square and bubble level to ensure that this is true.
Using a pencil, mark two points along the center of the left stud, and two points along the center of the right stud. These points should be nicely inside four of the holes in your paper template. This is where you’ll drill.
In the photo below, you can see my mount’s paper template adhered to my wall. I will be drilling into the center of my wall’s metal studs at the four extreme corners of the holes in the template.
Step 6: Check your Work
Before we begin drilling, double-check that you’re ready:
- Verify that your paper template is level.
- Verify that the four drill points you’ve marked on your wall behind the paper template are at the precise center of your wall’s studs.
- Use your stud finder again to do this.
- Verify that the center of the mount is close to where you wanted the center of the mount to be in Step 3.
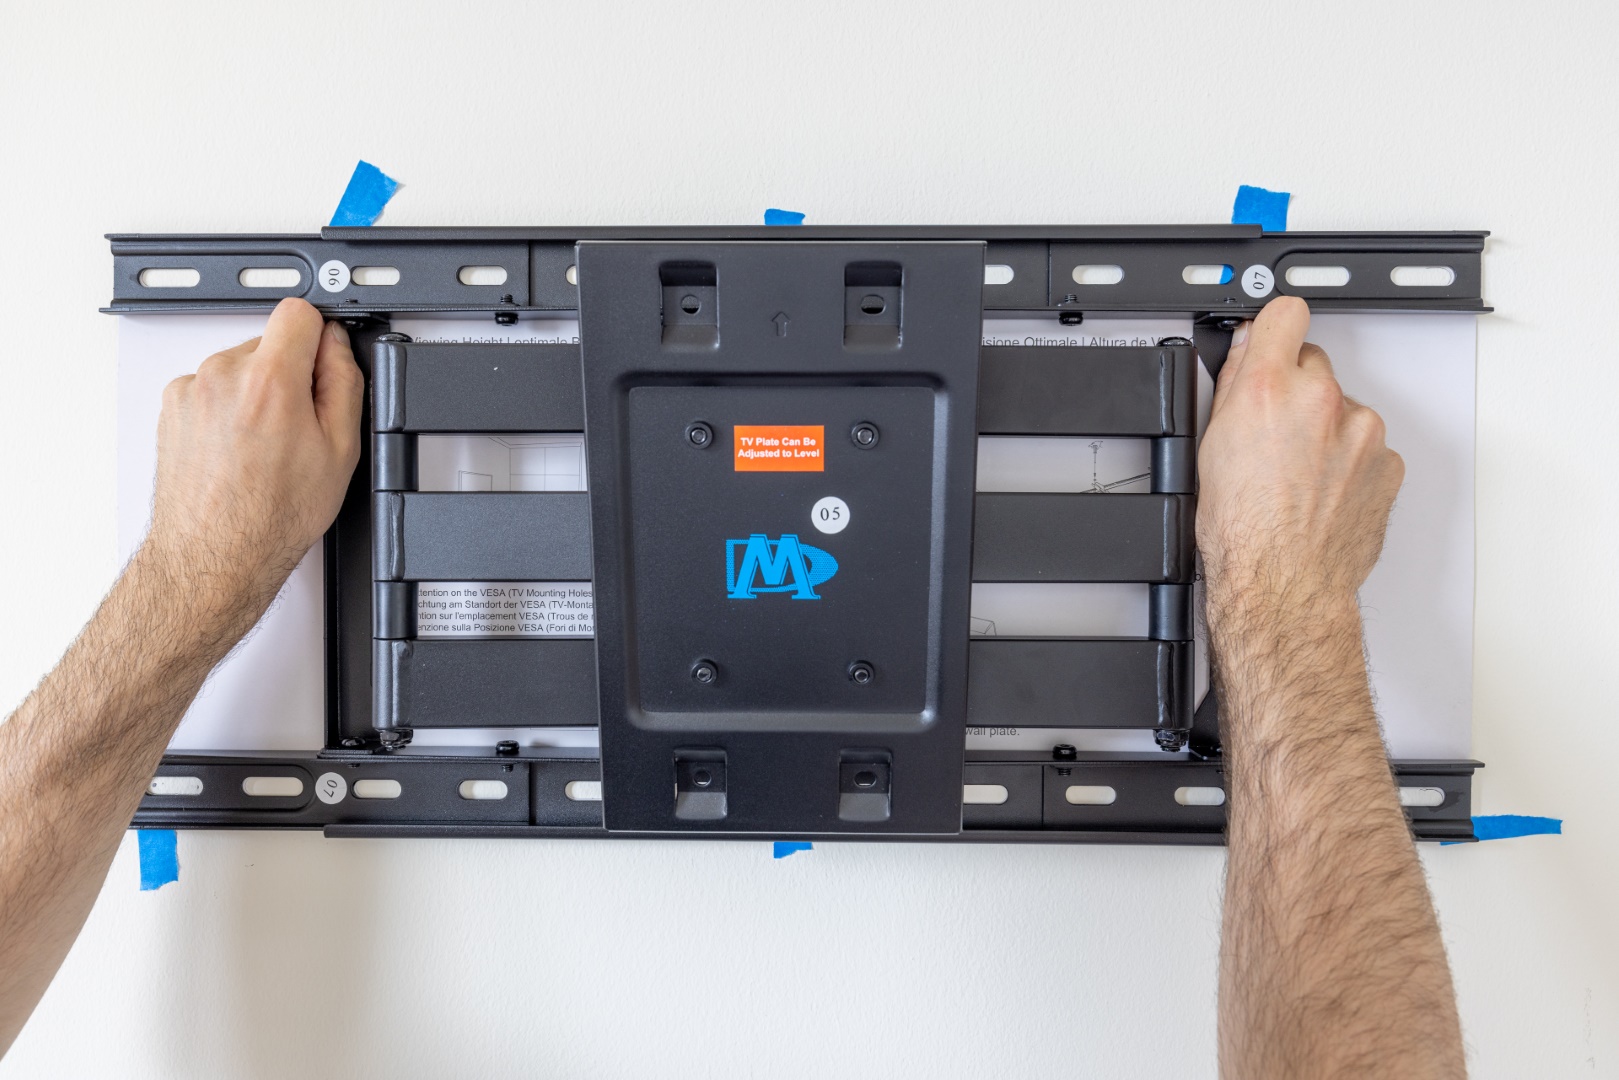
- Verify that the actual mount lines up with the paper template by holding up the mount to the template (see the photo below).
Step 7: Drill and Insert Toggle Bolts!
After you’ve marked your four drill points on your wall, remove your taped paper template from the wall. Let’s drill!
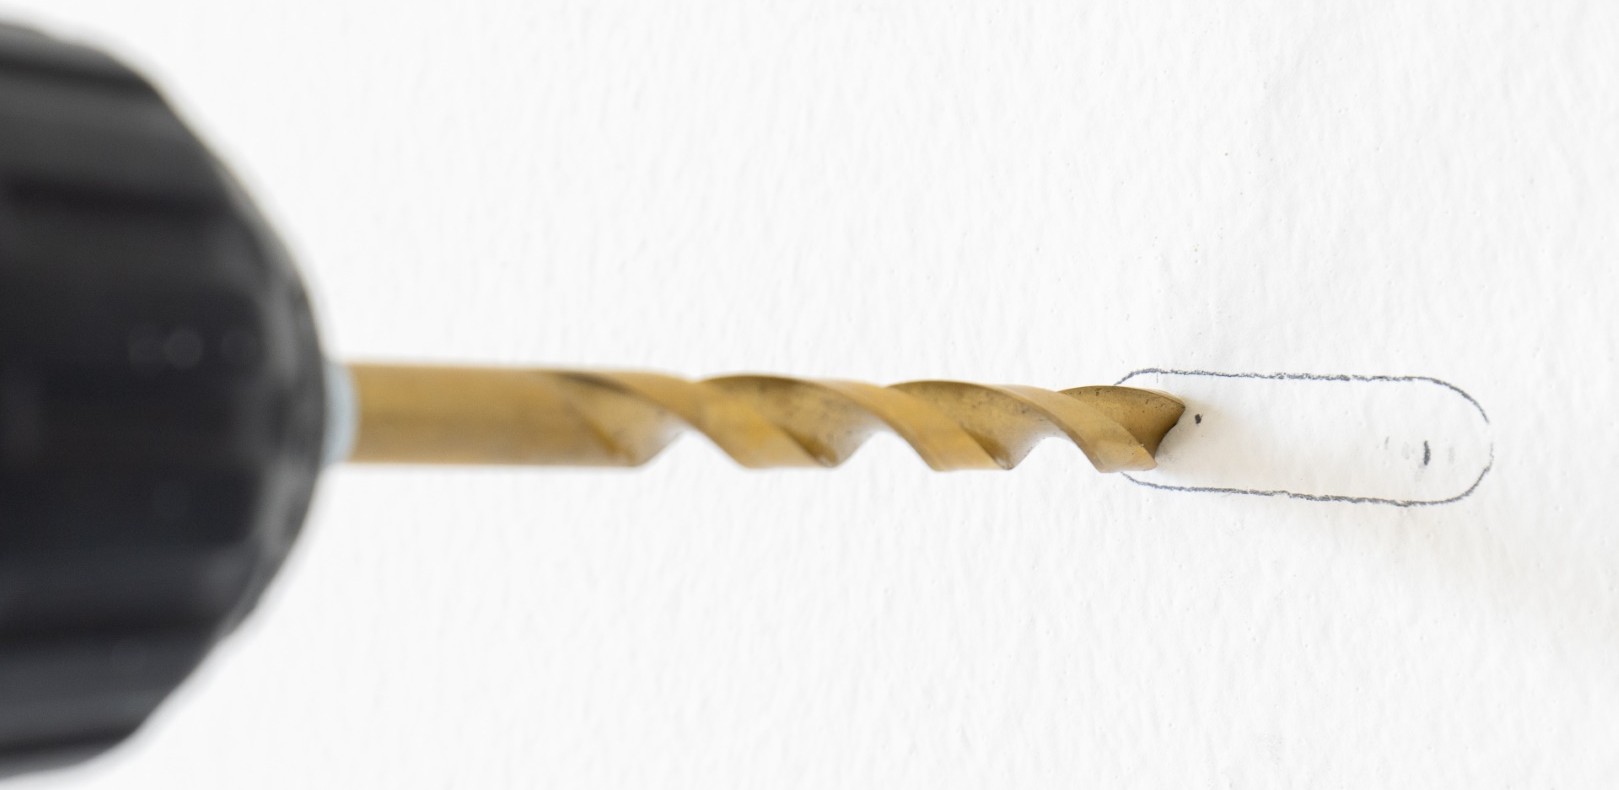
- Using your 1/4″ drill bit, drill into your wall at one of the four points you marked. You should feel significant resistance when you reach the metal stud after punching through your drywall. Keep drilling through the metal stud!
- Once you’re through the metal stud, back out your drill bit.
- Replace the 1/4″ drill bit with your 1/2″ drill bit.
- Using your 1/2″ drill bit, drill into the wall at the same point as in (1) above. Drill through the metal stud.
- Once you’re through the metal stud, back out your drill bit.
- Repeat 1-5 with the three remaining drill points on your wall.
Now that you have four 1/2″ holes in your wall, it’s time to insert your toggle bolts.
Follow the instructions included with your toggle bolts to learn how to insert them into the 1/2″ holes, slide the plastic cap into the hole, and snap off the extra plastic tie. You’re almost there! You’ve done the hardest parts.
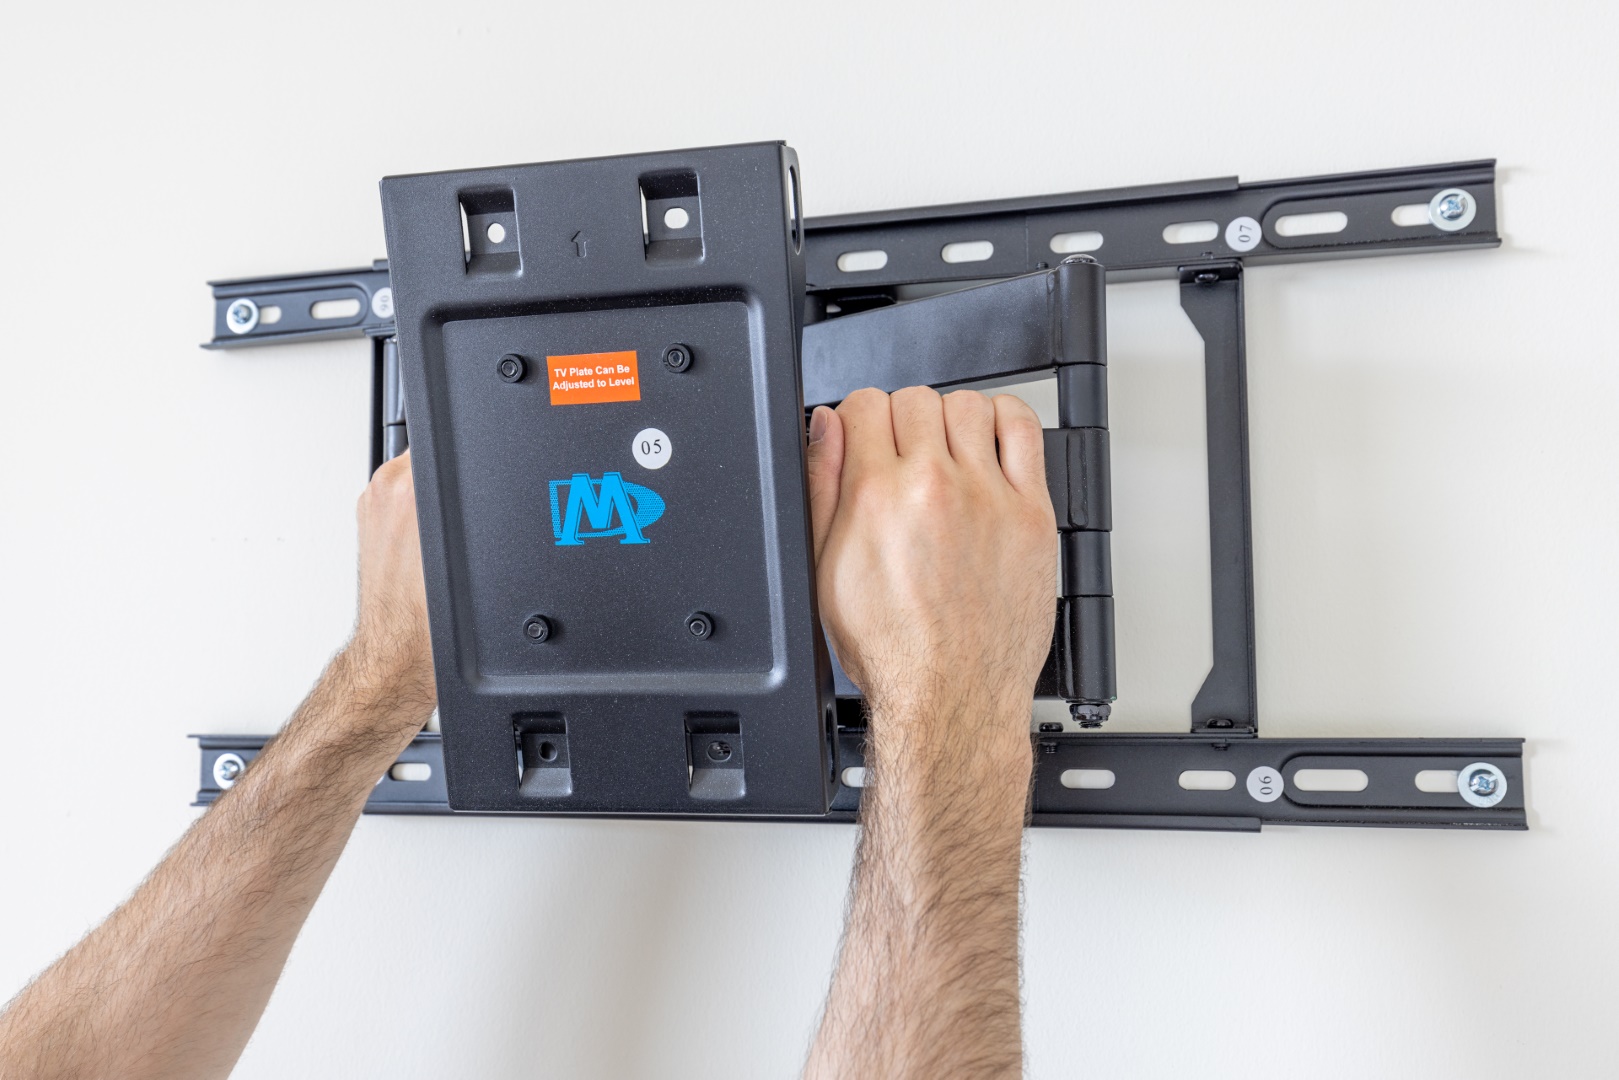
Step 8: Secure the Wall Mount
Using your washers, four of the bolts included with your toggle bolts, and your Phillips-head screwdriver, secure your wall mount to the wall.
Step 9: Force-Test the Wall Mount
Now that the wall mount is on your wall, let’s make sure that it can hold some weight!
Using your hands, pull down on the mount with significant static force – don’t yank! With your body’s weight, try to emulate the weight of your TV on the mount. If the mount starts to come off the wall, stop immediately.
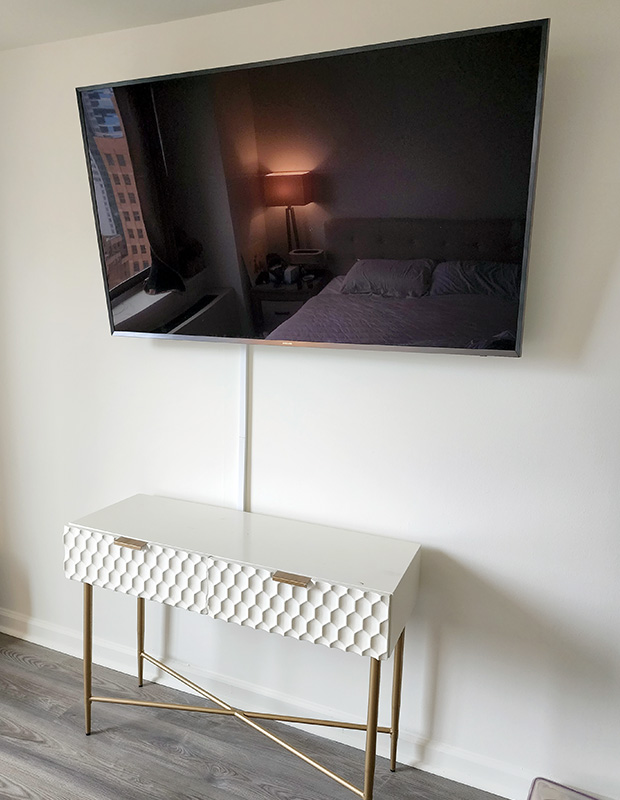
Step 10: Mount the TV!
Following the instructions included with your wall mount, hang your TV on the mount. Adjust its tilt as necessary.
Please be mindful of the fact that articulating your TV further away from the wall drastically reduces the load capacity of the toggle bolts. Keep your TV as close to the wall as you can, unless you feel very confident about the load capacity of your toggle bolts. If you mounted your TV into wooden studs, this is not a problem; wooden studs can comfortably hold the weight of your TV, even at maximum articulation.
Congratulations – you did it! Let’s watch some TV!